I've been lifting weight for longer than I have been a software engineer, and you wouldn't think that lifting weight would make me a better software engineer but I believe I has.
When I was young, I wanted to bench 100Kg (a good target for bench it's triple digits), I obviously didn't just get a gym membership jump on a bench and try 100Kg out. I would have failed and most likely hurt myself.
First I found out what I could bench, then I made a plan, of what I would need to do between then and doing 100Kg on bench. I decided I would train three time a week, using the idea of progressive overload, each time lifting a bit more than the last till I got to 100Kg.
I got to 100Kg.
Projects in software are no different, you might have a amazing project idea, the wrong way is to jump into code and try to do it all.
The better way is to take a step back, plan, break it into chunk that can be achieved with regular consistent work.
I did this from the day I started in software and I can honestly say it's made me better and projects are far more achievable.
Friday, 11 January 2019
Thursday, 27 July 2017
Finding LDAP user groups
LDAP Groups:
These can be used to segregate access permissions for various tools, most of the Atlassian suite can be managed this way for access to projects. Maybe even the tool itself.
From a non-admin persons perspective it can sometimes be hard to find out if you are a member of an LDAP group. You need to be able to query an LDAP server and then find the right group, even if you know the group name you might not know how to get this information.
Well turns out that we can use a windows command to skip straight there:
This gives us a window in which we can search for Users, Contacts and Groups. Then we can highlight the group or users and find the basic information that we might need.
These can be used to segregate access permissions for various tools, most of the Atlassian suite can be managed this way for access to projects. Maybe even the tool itself.
From a non-admin persons perspective it can sometimes be hard to find out if you are a member of an LDAP group. You need to be able to query an LDAP server and then find the right group, even if you know the group name you might not know how to get this information.
Well turns out that we can use a windows command to skip straight there:
C:\Windows\System32\rundll32.exe dsquery,OpenQueryWindow
This gives us a window in which we can search for Users, Contacts and Groups. Then we can highlight the group or users and find the basic information that we might need.
Monday, 17 July 2017
Jenkins, Bitbucket and Static Analysis
Static Analysis
So you are running static analysis on your builds, great. However who actually views this after the first few weeks? We get all excited about driving home the gains of automatic potential bug finding but who really goes and fixes all the issues, cannot say I've seen many sprints with a ticket to fix a particular issue across the whole code base. But there is a better way of presenting this data, why not put those comments on a code review in Bitbucket and have them reviewed along with the code. This way in with the review you can get feedback on what your static analysis says about your code. I think this is by far the best place to have a snapshot of the information, but still have the full info on Jenkins or CI, so you can see the trends over time. This builds on the workflow that we have already in Jenkins and Bitbucket back in Jenkins pipeline + Bitbucket pull request, so if you haven't done that part yet please go back as we are building on that process.Process Requirements:
1. User creates a pull request for his branch.
2. Jenkins builds the pull request merged with the target branch.
3. Static Analysis is done on the code during the Jenkins job.
4. Comments on the pull request are reported back to Bitbucket.
This is the basic requirements that we will satisfy as normal we had some dependencies.
System requirements
Jenkins:
Jenkins (2.19.1)
Violation Comments to Bitbucket Server Plugin (1.51)
Starting in Jenkins 2.0 there are some security changes for parameters given via a URL and these parameters need to be whitelisted before Jenkins runs.
Special startup parameters:
To Whitelist the parameters you will need to add the parameters to the end of this system property.
“-Dhudson.plugins.git.GitStatus.safeParameters= PULL_REQUEST_TO_REPO_PROJECT_KEY
PULL_REQUEST_TO_REPO_SLUG”
For windows this can be done using the Jenkins.xml in the Jenkins home DIR. These need to be added before the -jar term as parameters after this are ignored.
Ubuntu:
Ubuntu:
File: /etc/default/Jenkins
Property: JAVA_ARGS
RedHat:
File: /etc/sysconfig/Jenkins
Property: JENKINS_JAVA_OPTIONS
RedHat:
File: /etc/sysconfig/Jenkins
Property: JENKINS_JAVA_OPTIONS
General Jenkins Configuration
In the manage Jenkins GUI you can add to the default
Bitbucket Server Violations Server Defaults
Username/password : username and password to use for bitbucket
Base URL: url of bitbucket in your organisation
Bitbucket Server Violations Server Defaults
Username/password : username and password to use for bitbucket
Base URL: url of bitbucket in your organisation
Job Specific configuration
Add the following parameters to the build:
PULL_REQUEST_TO_REPO_PROJECT_KEY
PULL_REQUEST_TO_REPO_SLUG
For an example we can use pylint on python code in windows using this windows batch script:
mkdir pylint
for /R %%i in (*.py) do pylint -rn -f parseable "%%i" >> pylint\\pylint.log
In the post-build actions set the following:
Report violations to Bitbucket Server:
Project key: ${PULL_REQUEST_TO_REPO_PROJECT_KEY}
Repo_slug: ${PULL_REQUEST_TO_REPO_SLUG}
Pull Request ID: ${PULL_REQUEST_ID}
I set to comment one per violation as it's a little easier to see the comments on the line.
The file search for violations searches the absolute path, it's not relative to the workspace:
.*/*pylint\.log$
Now the way the plugin works is that the violations are uploaded from the node using the account in the job, I would use a service account for this, so it's easy to see that it has come from Jenkins. If you are using self-signed certificates, you will need to add the certificate to the Java keystore which the agent is using to connect.
Obtain the certificates that you need.
Use the keytool.exe in JAVA_HOME\bin\keytool.exe
Then use the keytool with commands similar to the following
"keytool -import -alias server_name -file cert.cer -keystore JAVA_HOME\lib\security\cacerts -storepass changeit -noprompt"
BitBucket Configuration
(Jenkins_url)/git/notifyCommit?url=${PULL_REQUEST_TO_SSH_CLONE_URL}&branches=pr&sha1=${PULL_REQUEST_FROM_HASH}&PULL_REQUEST_URL=${PULL_REQUEST_URL}&PULL_REQUEST_ID=${PULL_REQUEST_ID}&PULL_REQUEST_TO_BRANCH=${PULL_REQUEST_TO_BRANCH}&PULL_REQUEST_TO_REPO_PROJECT_KEY=${PULL_REQUEST_TO_REPO_PROJECT_KEY}
I have only done this for a FreeStyle Job so far but there is a good example on the plugin page
Wednesday, 8 February 2017
Pandas wheel building
Pandas is a great library for data analysis but working with it on windows with a set version of numpy can be problematic. We deploy packages internally as wheels, and our code relies on a later version of numpy.
So what's the solution, build a wheel with the version of numpy that we use, this can be done if you have the python compiler for windows.
We use Python 2.7 for which you can find the installer here
Voila, one wheel built with numpy==1.9.3+mkl, this can then be installed by pip on various environments.
So what's the solution, build a wheel with the version of numpy that we use, this can be done if you have the python compiler for windows.
We use Python 2.7 for which you can find the installer here
virtualenv pandas
cd pandas\scripts
activate
cd ../..
pip install numpy==1.9.3+mkl --no-index --find-links=z:\PythonWheels
cd Source
python setup.py build_ext --inplace --force
python setup.py bdist_wheel
Voila, one wheel built with numpy==1.9.3+mkl, this can then be installed by pip on various environments.
Friday, 6 January 2017
Jenkins pipeline + Bitbucket pull request
Bitbucket and Jenkins pull requests
Update: Part 2 Static Analysis and pull requests in bitbucket.
I found this which details pretty much what we were required to do, thanks goes to Christian Galsterer for doing this in the first place, but I came across several differences and we needed to extend the behaviour to working with pipeline builds as well.
Process Requirements:
1. User creates a new branch (e.g. feature, bugfix).
2. After completing his development work and pushing his changes to Bitbucket
the user creates a pull request.
3. In order to approve a pull request we require at least one successful
Jenkins build. Thereby we would like to get not only the build result of the
code checked in for the pull request but get the build status after the code
has been merged with the target branch.
4. When a pull request is created/updated Jenkins shall be triggered
automatically for real continuous integration.
5. The source of the pull request shall be automatically merged with the
target branch.
6. Set the build description with the pull request ID and a link back to
the Bitbucket pull request.
7. The build result shall be reported back to Bitbucket.
8. Only if the build was successful and the number of successful builds
configured in Bitbucket is reached the pull request can be approved and merged.
This is the basic requirements that we need to satisfy and we had some dependencies.
This is the basic requirements that we need to satisfy and we had some dependencies.
System requirements
Jenkins:
Jenkins (2.19.1)
With the following plugins:
Pre SCM build step (0.3)
Groovy plugin (1.29)
Groovy installed and on the
system path.
Git Plugin(3.0.0)
Stash Notifier (1.11.4)
This
requires a username and password for bitbucket to update the pull request.
Pipeline plugin
Starting in Jenkins 2.0 there are some security changes for parameters, and these need to be white listed at the Jenkins Master.
Starting in Jenkins 2.0 there are some security changes for parameters, and these need to be white listed at the Jenkins Master.
Special startup parameters:
To make the parameters passable from the commit notify to
the jobs the parameters need to be added to the start-up parameters of Jenkins
this is to do with security changes in Jenkins.
“-Dhudson.plugins.git.GitStatus.safeParameters= PULL_REQUEST_URL,
PULL_REQUEST_ID, PULL_REQUEST_FROM_HASH, PULL_REQUEST_TO_BRANCH”
For windows this can be done using the Jenkins.xml in the
Jenkins home DIR. These need to be added before the -jar term as parameters
after this are ignored.
Ubuntu:
Ubuntu:
File: /etc/default/Jenkins
Property: JAVA_ARGS
RedHat:
File: /etc/sysconfig/Jenkins
Property: JENKINS_JAVA_OPTIONS
RedHat:
File: /etc/sysconfig/Jenkins
Property: JENKINS_JAVA_OPTIONS
BitBucket Plugins:
Configuration
Once installed the plugin needs to be configured for use. First we are going to do a straight commitnotify, they work by taking the GIT repo url and then matching it to a job in Jenkins that isa configured for polling (there does not need to be a poll interval it's just the url that it will match with)
BitBucket Configuration
Pull request notifier in bitbucket is done using the
following:
1.
Install the Pull Request Notifier for Bitbucket add-on
via the Universal Plugin Manager or manually by downloading from the Atlassian
Marketplace.
2.
Administration > Manage Add-ons > Pull
Request Notifier > Configure
3.
Select trigger only if there are no conflicts.
4.
Select the following triggers:
a.
OPENED
b.
REOPENED
c.
RESCOPED
d.
RESCOPED_FROM
e.
RESCOPED_TO
5.
Enter Jenkins URL
6.
Choose GET as the HTTP method
7.
Use the following URL:
a.
(Jenkins_url)/git/notifyCommit?url=${PULL_REQUEST_TO_SSH_CLONE_URL}&branches=pr&sha1=${PULL_REQUEST_FROM_HASH}&PULL_REQUEST_URL=${PULL_REQUEST_URL}&PULL_REQUEST_ID=${PULL_REQUEST_ID}&
PULL_REQUEST_TO_BRANCH=${ PULL_REQUEST_TO_BRANCH}
8.
Save the trigger using save (note the view does
not refresh)
The notifier plug in exposes certain MACROS
PULL_REQUEST_TO_SSH_CLONE_URL : this is the url of the GIT
repo
PULL_REQUEST_TO_BRANCH: name of the pull request branch
destination
PULL_REQUEST_FROM_HASH: SHA1 of the commit to merge into the
branch
PULL_REQUEST_URL: Pull request URL in bitbucket
PULL_REQUEST_ID: pull request ID
The repo is located at https://github.com/tomasbjerre/pull-request-notifier-for-bitbucket
General Jenkins Configuration
SCM
Git
needs to have a username and password in the global configuration so that it
can finish some merge requests, this is required if the tip of master is
updated and the GIT on the agent cannot fast forward to the tip of the branch
to be merged.
Global Security settings:
Change the Markup Formatter to be HTML
safe rather than plain text so that this can work.
Stash Notifier Plugin:
Jenkins > Configure System
> Stash Notifier
Enter Root URL, Stash user and
the stash password
If you use self-signed SSL certs you might need to set ignore SSL for testing, this issue should be solved before deploying live.
If you use self-signed SSL certs you might need to set ignore SSL for testing, this issue should be solved before deploying live.
Job Specific configuration
Parameters
Parameterize the build with the following options:
PULL_REQUEST_URL : string
PULL_REQUEST_ID: string
PULL_REQUEST_TO_BRANCH: string
PULL_REQUEST_TO_BRANCH: string
SCM
SCM GIT configuration, the GIT url must be accessed by SSH,
this is important due to the commit notify is only done if the repository
url is the same.
The branch specifier must be of the form: pr
This is so only pull requests are
built by this job
Tick the option merge before build use the following
options:
Name: origin
Branch: ${PULL_REQUEST_TO_BRANCH}
Merge: default
FF mode : --ff
Triggers
Polling must be enabled, no polling period needs to be set. This is due to the way in which the commitnotify has been done within the git plugin.
Pre-build step
“Run build step before SCM” system Groovy script to set the
build description:
 def currentBuild = Thread.currentThread().executable
 def PULL_REQUEST_URL = build.buildVariableResolver.resolve('PULL_REQUEST_URL')
 def PULL_REQUEST_ID = build.buildVariableResolver.resolve('PULL_REQUEST_ID')
 def description = "<a href='$PULL_REQUEST_URL'>PR #$PULL_REQUEST_ID</a>"
 currentBuild.setDescription(description)
Pipeline jobs
Pipeline job needs to be configured slightly differently as commit notify does not operate on these. Instead we use buildwithparameters to trigger the job in Jenkins in any case configuration is detailed below.
BitBucket
For the Pull request trigger the following needs to be
configured:
Injection Url:
http://JENKINS_URL/crumbIssuer/api/xml?xpath=//crumb
Injection regexp:
<crumb>([^<]*)</crumb>
Basic authentication:
username and password
URL:
http://(JENKINS_URL)/job/JOB_NAME/buildWithParameters?token=TOKEN&cause=PULL_REQUEST&PULL_REQUEST_URL=${PULL_REQUEST_URL}&PULL_REQUEST_ID=${PULL_REQUEST_ID}&PULL_REQUEST_TO_BRANCH=${PULL_REQUEST_TO_BRANCH}&PULL_REQUEST_FROM_HASH=${PULL_REQUEST_FROM_HASH}
This needs to be a POST action
A header needs to be added:
Header:
Jenkins-Crumb
Value:
${INJECTION_URL_VALUE}
This trigger will now trigger the job in Jenkins to be built
with parameters that are required to merge the pull request in the target
repository.
Below is an example of a script to merge the two and the
notify stash.
Parameters
Parameters
Parameterize the build with the following options:
PULL_REQUEST_URL : string
PULL_REQUEST_ID: string
PULL_REQUEST_TO_BRANCH: string
PULL_REQUEST_TO_BRANCH: string
 stage 'merge'
 node {
   def description = "<a href='$PULL_REQUEST_URL'>PR #$PULL_REQUEST_ID</a>"
   currentBuild.setDescription(description)
   sh 'git config --global user.name "Jenkins"'
   sh 'git config --global user.email "jenkins@jenkins.com"'
    checkout changelog: true, poll: true, scm:
   [$class: 'GitSCM',
     branches: [[name: PULL_REQUEST_FROM_HASH ]],
     doGenerateSubmoduleConfigurations: false,
     extensions: [[ $class: 'PreBuildMerge',
             options: [mergeStrategy: 'MergeCommand.Strategy', fastForwardMode: 'NO_FF', mergeRemote: 'origin', mergeTarget: PULL_REQUEST_TO_BRANCH]]],
             submoduleCfg: [],
             userRemoteConfigs: [[credentialsId: 'jdengel', url: 'ssh://git@172.17.23.33:7999/pul/branch_test.git']]]
    echo 'done'
 }
  stage 'notify'
 node {
   step([$class: 'StashNotifier'])     // Notifies the Stash Instance of an INPROGRESS build
    try {
     // Do stuff
      currentBuild.result = 'SUCCESS'   // Set result of currentBuild !Important!
   } catch(err) {
     currentBuild.result = 'FAILED'   // Set result of currentBuild !Important!
   }
    step([$class: 'StashNotifier'])     // Notifies the Stash Instance of the build result
 }
Tuesday, 6 December 2016
Getting Credentials into Jenkins scripts
So you need a password or key to be hidden but used inside a Jenkins script.
The Credentials Binding Plugin is what you need to use. This can inject these as environmental variables in your Jenkins job scripts:

This way you can then use them later in a script to clone a repository without giving out your password to a Jenkins slave, like so:
This works with files for ssh keys as well, so you can now script your password and keys into your scripts. A service account with access only to what it needs to would be the best way to support this and you have those access credentials as safe as your jenkins master is.,
The Credentials Binding Plugin is what you need to use. This can inject these as environmental variables in your Jenkins job scripts:

git clone https://$SECRET@bitbucket/scm/project/repository.git
This works with files for ssh keys as well, so you can now script your password and keys into your scripts. A service account with access only to what it needs to would be the best way to support this and you have those access credentials as safe as your jenkins master is.,
Friday, 25 November 2016
Triggering bamboo, with only specific file change in source control
Another small issue while working on bamboo today, I wanted to only trigger a bamboo plan from a specific subset of a SVN or GIT repository, so we can only trigger full test builds when we change real code and not on documentation updates.
So you think this would be easy right ? Not exactly.
There is a menu option in Bamboo under the repositories menu as follows :

So input a small change like the above for change just on XML files. Change the files in the test repository and boom, nothing.
So it turns out after some digging that Bamboo only matches on the full file path, some examples are here
After knowing this it becomes a little easier to get right, but it's not obviously clear and as a user there is no trigger log immediately available it's not clear how to proceed, hopefully this clears things up.
Tuesday, 27 September 2016
Silent Install Pycharm with shortcut
So I was having an Issue where an installer was not creating a shortcut on the desktop, turns out it was a installer issue but due to the fact we SCCM to deploy we can run a simple powershell script to solve this issue.
Below is the script, that needs to be run as admin.
$InstallPath = "${env:ProgramFiles(x86)}\JetBrains\PyCharm Community Edition 5.0.4\"$InstallPath.\pycharm-community-5.0.4.exe /S /D=$InstallPath# Create a Shortcut with Windows PowerShell$TargetFile = "$InstallPath\bin\pycharm.exe"$ShortcutFile = "$env:Public\Desktop\Pycharm.lnk"$WScriptShell = New-Object -ComObject WScript.Shell$Shortcut = $WScriptShell.CreateShortcut($ShortcutFile)$Shortcut.TargetPath = $TargetFile$Shortcut.Save()
UPDATE 10/07/2017:
I have found the real reason why this is required, when using silent install the installer will always default to non-admin and as such does not do the following:
-
No shortcut gets created in the
Public\Desktop
-
No Start Menu entries are created
-
The software is not listed in the “Programs
and Features” list in Control Panel
-
No registry key is added to the
HKLM:\..\Uninstall branch
-
The uninstall registry key is created in the
HKCU branch
this is tracked here:
IDEA-146215
Tuesday, 12 April 2016
SSH Keys and Windows, basic no passphrase
For most people GIT access is controlled via username and password, this is fine when working only a small project, when rarely doing push and pull from your remote repos online. However the next step is to use an SSH key.
This mean that you share some information between your PC and the remote server, these are called keys, for the uninitiated. Using the Git for Windows installer and OpenSSH you can generate and configure an SSH key for the connection.
Disclaimer - This is not the most secure method but is meant to be a stepping stone to passphrase based SSH with an agent.
To create an SSHKey look to use the ssh-keygen application that comes with GIT for windows.
The SSH-keygen application is normally stored in the C:\Program Files\Git\usr\bin\ and a key can be generated with the following command
"ssh-keygen" -t rsa -f bitbucket_rsa -N ""
Details:
-t type RSA
-f filename butbucket_rsa
-N passphrase
The command above creates a key pair in the current directory called bitbucket_rsa and bitbucket_rsa .pub with no passphrase. You will need to copy the bibucket_ras to the ~.ssh folder in your user directory.
-t type RSA
-f filename butbucket_rsa
-N passphrase
The command above creates a key pair in the current directory called bitbucket_rsa and bitbucket_rsa .pub with no passphrase. You will need to copy the bibucket_ras to the ~.ssh folder in your user directory.
To make the PC use the private key (bitbucket_rsa) when making the connection, you can use the config file in the ~/.ssh directory. This file is formatted in the following way.
host bitbucket.blah.com
IdentityFile ~/.ssh/bitbucket_rsa
Details
host then the URL of the server that you are making the connection to.
Identify file this is the location of the private key file.
To add a ppublic key into your bitbucket account you need to do the following:
host then the URL of the server that you are making the connection to.
Identify file this is the location of the private key file.
To add a ppublic key into your bitbucket account you need to do the following:
- Sign in to bitbucket
- click the top right hand profile button
- click the manage account button
- click SSH keys
- click on the add key button
- copy and paste the contents of the bitbucket_rsa.pub into the text box and then click add key.
Your key is now on the server.
When you make the first connection over command line to the server, you will be asked if you accept the host key the server and a finger print will be shown much like below:
When you make the first connection over command line to the server, you will be asked if you accept the host key the server and a finger print will be shown much like below:
[bitbucket.com]:3456,[0.0.0.123]:9090 ssh-rsa RRRB3NzaC1yc2EAAAADAQABAAABAQCch1FyAnxrvKPw7AkhVyfR9FOJNVzIAUfgxlhHDR7rafYgmJkSwUCZtsYKRv6wNUEeRHh5EU/yYr/2zn0+5l2A/AG6X95SwrBBSzpeelFo2hoIjIZmnHv93k5VK0OXfpAfKqBRDMY5s1tVcdyKa6qCirHydyYbViM3Ob3mBhrhY/w87jXZqaMLQlNUbMfH6iGdaVBNeqgqSPeclgHge7kwSoIukMY0pqiQAinS0bb3aPzl4dwNCJBrghV1eYKGHL7/ESX+Mj8PrsJDzWv1IxG6Ey5jjcY+zw/386sKY2QbmB55m91lg50LfEZP/1OorbLBxDqThAW5maU7J27knGaR
Once verified this will be contained in a knownhosts file in the .ssh directory, the same location as the config file and the private key.
Now you should have a very simple SSH connection available.
Now you should have a very simple SSH connection available.
Wednesday, 24 February 2016
Atlassian SourceTree 1.8
So today I received an e-mail about the new SourceTree release from Atlassian, since I really like Atlassian products (can you probably tell from other posts on Bamboo) and have been using sourcetree for a while, I was excited to check out the improvements.


What I got was a a complete UI change that has ruined the experience of SourceTree completely, a few of the notes that I and many other haven't liked about it.
Icons
Flat, bland, and near identical icons, means you need to read the text rather than looking at the icon, which I think is the point of an icon, to be visual.
Read Pane

Why oh why is the read pane done in this way, the text is centred. With a white background.
This just is crazy and looks very weird, not sure why this has been done this way.
There is a lot of vocal dislike of this, present here
Monday, 11 January 2016
Bamboo and Squish session 1 vs session 0
Bamboo and Squish
using different sessions
using different sessions
I am looking at integrating squish and bamboo for GUI testing using QT. Squish is a good choice of tool for this as the program is written in python and Squish can run scripts in python and so a good deal of knowledge can be carried over. However these are some caveats to this approach, the main one I shall address today is that the service and the user GUI run under different sessions and are therefore hard to integrate.
Windows uses different sessions for services, as Bamboo only runs as a service, it runs in session 0, so if a application is started in that session it will not have a GUI. This creates an issue for GUI testing. Squish helpfully gives an API that the squishrunner can use to solve this:
Windows uses different sessions for services, as Bamboo only runs as a service, it runs in session 0, so if a application is started in that session it will not have a GUI. This creates an issue for GUI testing. Squish helpfully gives an API that the squishrunner can use to solve this:
startapplication("AUT")
This tells the squish server to start the configured AUT, this will be created in the same session as the squish server which needs to be a user session so that a GUI is created. As you can see that's an other caveat of the process, in that the server needs to be in a user session and so it cannot be started by the bamboo service. Therefore we need to use the auto log-on feature of windows documentation on the windows site here which are summarised below:
[HKEY_LOCAL_MACHINE\SOFTWARE\Microsoft\Windows NT\CurrentVersion\Winlogon]
"AutoAdminLogon"="1"
"AutoLogonCount"=dword:99999999
"DefaultDomainName"="domain.com"
"DefaultPassword"="blahblah"
"DefaultUserName"="squish"
Once logged on we can use a startup script (simple bat file in the startup folder) to run the squishserver and we have a squish server running in a user session that can talk to a squishrunner running in session 0 with the services.
There is another issue with
startapplication("AUT") It starts the application from scratch, for an application with a large startup time this can be quite annoying and time consuming for each test that you need to run a better way is using the startaut application to start the application in an "attachable state" from the first instance. Therefore I wrote a little wrapper for this application so that the AUT is started from the python script in an attachable way. To start it in the user context I compiled the python using py2exe and pass it the attachable parameters...
 """
   This will create the start aut wrapper for squish and bamboo
   using py2exe it will start the AUT on the port given.
 """
 from __future__ import print_function
 __author__ = 'jdengel'
 #######################################
 # main program starts here
 import os
 import sys
 import subprocess
 import time
 def is_number(string_to_test):
   """
   :param string_to_test: checks string is a int
   :return: BOOL
   """
   try:
     int(string_to_test)
     return True
   except ValueError:
     return False
 def validate_args():
   """
   validate the arguments
   1. number port
   2. AUT to start
   3. location of the startaut from squish
   :return:
   """
   if len(sys.argv) != 4:
     print("incorrect number of paramter given\n"
        "expected:\n"
        "port, app, location of startaut")
     return 2
   if is_number(sys.argv[1]) is False:
     print("Port is not a number {0}".format(sys.argv[1]))
     return 3
   if os.path.isfile(sys.argv[2]) is False:
     print("file to start does not exist, this is an issue {0}".format(sys.argv[2]))
     return 4
   if os.path.isfile(sys.argv[3]) is False:
     print("start aut application does not exist {0}".format(sys.argv[3]))
     return 5
   return 0
 RET_VALUE = validate_args()
 if RET_VALUE is not 0:
   sys.exit(RET_VALUE)
 # open the AUT on the right port
 try:
   subprocess.Popen([sys.argv[3], '--port={}'.format(sys.argv[1]), sys.argv[2]])
   print("Starting application to test on port {0}", sys.argv[1])
 except SystemError, exp:
   print("Fatal error - {0}".format(exp.message))
   sys.exit(8)
 print("finishing START_AU application")
This allows the squish scripts to start the application in an attachable state and therefore streamline the process of testing since an application might take a long time to startup.
The only thing to be careful of it that you reset the application back to a known state after the test has finished. This can be done using the init and cleanup functions in the squish python script.
So now you can streamline your testing.
Wednesday, 6 January 2016
Restart Windows machine remotely.
Let's face it sometimes you have to restart a machine.
But it's a VM, or you remote into the machine so you don't have access to the machine itself.
You need a way to restart a machine remotely and easily without having to remote in each time you want to do it.
You need the shutdown command that's in the command prompt. It takes the following arguments.
| Parameter | Function |
|---|---|
| -s | Shuts down the computer. |
| -r | Reboots the computer. |
| -f | Force-close all running applications. |
| -m \\Computer | Specifies a specific computer on the network that you want to shut down or reboot. Absent this parameter, the command affects only the local PC on which it is run. |
| -t xx | Sets a delay (xx seconds) before the specified operation commences. |
| -c "message" | Add your own text inside the quotations to provide remote users with a message about why and when their PC will shut down or reboot. |
| /a | Aborts a shutdown or restart if used during the (-t) delay period. |
| /h | Hibernates the computer. |
| /? | Displays the full help document with all commands. |
Now imagine that you need to restart a bamboo agent cluster as you updated the server and it requires a restart of the agents.
No problem as you can whip up a bat file to go through the cluster restarting the agents.
shutdown -f-r -m \\computer1
shutdown -f -r -m \\computer2
Now you have a simple script to restart a bank of computers without any trouble, no logging in or remotely accessing the machines.
Thursday, 3 December 2015
Bamboo and Python Unit Tests
Recently I have been moving to Bamboo and integrating all the sweet features that it has available. Using it has been a bit of mare to do some things - (Bamboo and Squish for GUI testing) I'll detail that in another post, and bamboo's design and use is completely different to Jenkins.
I think Bamboo's plan, task and job approach is very top down, as opposed to Jenkins which is quite bottom up.
However one of the easier things to get done was getting the build to fail on the output of units tests created using the standard library in python. Then getting the failures to appear once the build has been completed in the build results.
An example:
Create a new repository with a test folder with a test_test.py file containing the below
This created a very simple unit test case to check in bamboo. One pass and one fail. Simple right...
So create a new plan that has a single job with tasks to
a. clone the repository
b. run the tests, remembering to pipe the output into a junit xml output to the test report folder:
py.test --junitxml=test-reports\results.xml
exit 0
the exit 0 is important on windows because if you don't do this the bamboo job can fail from a failure to run the tests at this point and does not parse the results of the tests for display in the bamboo GUI. This is not what you want to occur because if the tests fail to run you still want the tests that you have run to give you information from the results screen.
Then use a junit parser task (built into bamboo from the word go) to process the results:
I think Bamboo's plan, task and job approach is very top down, as opposed to Jenkins which is quite bottom up.
However one of the easier things to get done was getting the build to fail on the output of units tests created using the standard library in python. Then getting the failures to appear once the build has been completed in the build results.
An example:
Create a new repository with a test folder with a test_test.py file containing the below
def test_failure():
    assert False
def test_pass():
    assert True
This created a very simple unit test case to check in bamboo. One pass and one fail. Simple right...
So create a new plan that has a single job with tasks to
a. clone the repository
b. run the tests, remembering to pipe the output into a junit xml output to the test report folder:
py.test --junitxml=test-reports\results.xml
exit 0
the exit 0 is important on windows because if you don't do this the bamboo job can fail from a failure to run the tests at this point and does not parse the results of the tests for display in the bamboo GUI. This is not what you want to occur because if the tests fail to run you still want the tests that you have run to give you information from the results screen.
Then use a junit parser task (built into bamboo from the word go) to process the results:

BAM (boo)
job done.
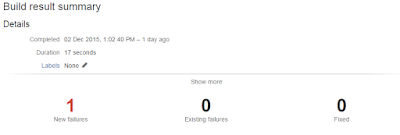
Unit test in bamboo, detecting a unit test fail and showing details about the test and number of builds it has been failing for. In all this is a really useful feature of bamboo that can be configured out of the box pretty much,
Friday, 2 October 2015
Creating PyVisa Wheel install on Windows
So I have some legacy software that requires PyVisa 1.3 and I'm building wheels for all the packages that require this as this is the new standard for python packaging.
I was having issues creating the wheel file or even installing from the tar file from PyPi until I came across this bug report and it worked a treat.
To sum up all the actions that I needed to do.
1. Get the Tar file.
2. Extract the source.
3. make the following changes
4. Navigate to the root of the source and make the wheel file
python setup.py bdist_wheel
Viola you have a windows wheel file that can be installed fast and effective to all virtual environments.
The newer versions are much easier to package into wheel files. I will be sure to post up about other packages that I have any issues with and the solutions to them as well.
I was having issues creating the wheel file or even installing from the tar file from PyPi until I came across this bug report and it worked a treat.
To sum up all the actions that I needed to do.
1. Get the Tar file.
2. Extract the source.
3. make the following changes
setup.cfg:
-prefix = /usr
In 'setup.py' home_dir can be derived in a platform independent fashion:
setup.py:
- home_dir = os.environ['HOME']
+ home_dir = os.path.expanduser('~')
4. Navigate to the root of the source and make the wheel file
python setup.py bdist_wheel
Viola you have a windows wheel file that can be installed fast and effective to all virtual environments.
The newer versions are much easier to package into wheel files. I will be sure to post up about other packages that I have any issues with and the solutions to them as well.
Thursday, 27 August 2015
Reserved Filenames on Windows
So today I was working on a full Atlassian product suite, you know Stash, Bamboo, JIRA. And we had a well known code base (the Linux kernel itself) that we are compiling on our Linux build agent.
However one of the development platforms is Window 7 (yes Windows 7 doesn't develop the Linux kernel but this is a test of the product suite and not windows 7 ability to compile the Linux kernel). So I'm cloning the Linux Kernel from Stash to Window 7 and it fails half way through and I'm thinking "Oh no Stash and Git must be configured incorrectly."
Once inspecting the git errors however it was complaining of
fatal: git rm: 'drivers/gpu/drm/nouveau/nvkm/subdev/i2c/aux.c': Permission denied
Obviously this had me trying again and then trying to create a file called aux.c on the desktop.
Queue a most random error from a file creation I have seen

The error was "specific device name is invalid" when creating the file aux.c on the desktop. Now as you can tell this got my interest and so off to google and windows and aux.c.
This lead me to an interesting little knowledge base article
https://support.microsoft.com/
where it details that some filenames on windows are reserved for certain things.
Has anyone ever come across this before, it such an oddity of Windows to do this.....
However one of the development platforms is Window 7 (yes Windows 7 doesn't develop the Linux kernel but this is a test of the product suite and not windows 7 ability to compile the Linux kernel). So I'm cloning the Linux Kernel from Stash to Window 7 and it fails half way through and I'm thinking "Oh no Stash and Git must be configured incorrectly."
Once inspecting the git errors however it was complaining of
fatal: git rm: 'drivers/gpu/drm/nouveau/nvkm/subdev/i2c/aux.c': Permission denied
Obviously this had me trying again and then trying to create a file called aux.c on the desktop.
Queue a most random error from a file creation I have seen

The error was "specific device name is invalid" when creating the file aux.c on the desktop. Now as you can tell this got my interest and so off to google and windows and aux.c.
This lead me to an interesting little knowledge base article
https://support.microsoft.com/
where it details that some filenames on windows are reserved for certain things.
  Name    Function
   ----    --------
   CON     Keyboard and display
   PRN     System list device, usually a parallel port
   AUX     Auxiliary device, usually a serial port
   CLOCK$  System real-time clock
   NUL     Bit-bucket device
   A:-Z:   Drive letters
   COM1    First serial communications port
   LPT1    First parallel printer port
   LPT2    Second parallel printer port
   LPT3    Third parallel printer port
   COM2    Second serial communications port
   COM3    Third serial communications port
   COM4    Fourth serial communications port
Has anyone ever come across this before, it such an oddity of Windows to do this.....
Subscribe to:
Posts (Atom)